Instalasi LAMP Dan phpMyAdmin di CentOS 6
LAMP adalah istilah yang merupakan singkatan dari Linux, Apache, MySQL dan Perl/PHP/Phyton. Merupakan sebuah paket perangkat lunak bebas yang digunakan untuk menjalankan sebuah aplikasi secara lengkap. artikel ini akan membahas cara Instalasi LAMP Dan phpMyAdmin di CentOS 6
Iseng-iseng saya mencoba oprek² php di VPS
- Instalasi Mysql
root@library [~]# yum install mysql mysql-server
root@library [~]# chkconfig --levels 235 mysqld on
root@library [~]# /etc/init.d/mysqld start
root@library [~]# mysql_secure_installation
root@library [~]#  mysql_secure_installation

NOTE: RUNNING ALL PARTS OF THIS SCRIPT IS RECOMMENDED FOR ALL MySQL
SERVERS IN PRODUCTION USE! PLEASE READ EACH STEP CAREFULLY!

In order to log into MySQL to secure it, we'll need the current
password for the root user. If you've just installed MySQL, and
you haven't set the root password yet, the password will be blank,
so you should just press enter here.

Enter current password for root (enter for none):
OK, successfully used password, moving on...

Setting the root password ensures that nobody can log into the MySQL
root user without the proper authorisation.

Set root password? [Y/n] <-- ENTER
New password: <-- yourrootsqlpassword
Re-enter new password: <-- yourrootsqlpassword
Password updated successfully!
Reloading privilege tables..
... Success!

By default, a MySQL installation has an anonymous user, allowing anyone
to log into MySQL without having to have a user account created for
them. This is intended only for testing, and to make the installation
go a bit smoother. You should remove them before moving into a
production environment.

Remove anonymous users? [Y/n] <-- ENTER
... Success!

Normally, root should only be allowed to connect from 'localhost'. This
ensures that someone cannot guess at the root password from the network.

Disallow root login remotely? [Y/n] <-- ENTER
... Success!

By default, MySQL comes with a database named 'test' that anyone can
access. This is also intended only for testing, and should be removed
before moving into a production environment.

Remove test database and access to it? [Y/n] <-- ENTER
- Dropping test database...
... Success!
- Removing privileges on test database...
... Success!

Reloading the privilege tables will ensure that all changes made so far
will take effect immediately.

Reload privilege tables now? [Y/n] <-- ENTER
... Success!

Cleaning up...

All done! If you've completed all of the above steps, your MySQL
installation should now be secure.

Thanks for using MySQL!

root@library [~]#
- Instalasi Apache
yum install httpd
chkconfig --levels 235 httpd on
/etc/init.d/httpd start
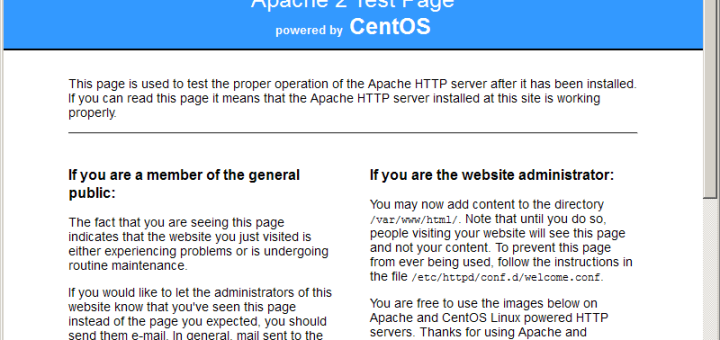
Lihat hasilnya di http://ipserveranda, jika tampil seperti gambar dibawah. berarti anda telah berhasil menginstall apache:

- instalasi php
root@library [~]# yum install php
root@library [~]# yum search php
root@library [~]# yum install php-mysql php-gd php-imap php-ldap php-mbstring php-odbc php-pear php-xml php-xmlrpc
root@library [~]# /etc/init.d/httpd restart
- Instalasi phpMyadmin
root@library [~]# rpm --import http://dag.wieers.com/rpm/packages/RPM-GPG-KEY.dag.txt
root@library [~]# yum install http://pkgs.repoforge.org/rpmforge-release/rpmforge-release-0.5.2-2.el6.rf.i686.rpm
Jika tidak bisa, anda bisa menggunakan EPEL (Extra Packages for Enterprise Linux)-nya si fedora, downloadnya disini
root@library [~]# yum install phpmyadmin -y
root@library [~]# vi /etc/httpd/conf.d/phpmyadmin.conf
#
# Web application to manage MySQL
#

#
# Order Deny,Allow
# Deny from all
# Allow from 127.0.0.1
#

Alias /phpmyadmin /usr/share/phpmyadmin
Alias /phpMyAdmin /usr/share/phpmyadmin
Alias /mysqladmin /usr/share/phpmyadmin
vi /usr/share/phpmyadmin/config.inc.php
[...]
/* Authentication type */
$cfg['Servers'][$i]['auth_type'] = 'http';
[...]
mkdir /var/www/phpadmin
cp -r /usr/share/phpMyAdmin/. /var/www/phpadmin
service httpd restart
NB:
- jika terdapat error saat mengakses phpmyadmin (./config.inc.php) is not readable, lakukan permission file :
root@library [~]# chmod 644 config.inc.php

